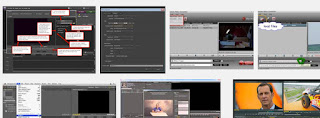
Teaching Video, Part 8 -- Ingesting into Adobe Premiere
Knowing how to ingest your video is no simple matter. It's essential to follow the same steps every time to avoid headaches and lots of lost time. Again, lots of material here comes from Kari Barber's initial tip sheet for this class at UNR.
The first step is to transfer your video files from your card (or the camera's internal memory, if you didn't film on your own card) to your external hard drive before returning the camera.
To do this, connect your external hard drive to one of the computers in the lab. Your external hard drive will appear on the desktop. Create a new folder on your hard drive for each story you are working on.
Connect the camera using the USB cord provided with the camera. Turn the camera on.
Follow the dialog boxes on the LCD screen to navigate to your card (or the internal memory). You can also plug your card into an SD card reader which can be read by the computer directly.
If plugging in with the camera, once the icon appears on your desktop showing that the camera is connected, drag and drop all of the files from your SD card/internal memory into the folder you just created on your hard drive. Make sure that folder is labelled clearly. It is very important here that you do not rename or delete any files. Just drag and drop them into your appropriately named folder on your hard drive.
Eject the camera (or SD card reader). Disconnect from the computer.
Open Adobe Premiere. There are three important things you need to do in the first dialog box. Select New Project, name the project, and hit Browse to navigate to the folder you created on your hard drive for this project. Save your project there. If you do not do this, you could run into serious trouble, such as not knowing where your project is, and losing it entirely. Before finishing select the Scratch Disks tab to make sure all of the boxes say “Same as Project”.
With a new project opened in Adobe Premiere, you now want to import your new clips. This is when you'll make sure that you do indeed have all of the clips that you filmed. Do this before returning the camera. There are several ways to do any action in Premiere the same goes for importing clips. One way is to right click in the box in the bottom left > import, then navigate to your video files on your hard drive. The .mts video files should be inside the Private/AVCHD/BDMV/Stream folders. Once you have found them, import the files. If all of your files are there you are ready to edit, congratulations! If your clips are not there, you may want to check to see if you saved to the camera's internal memory by mistake. If this is the case, return to the step when you are dragging and dropping files onto a specific folder on your hard drive.
If you enjoyed this tutorial, make sure to check out the other chapters in my video series.
Teaching Video, Part 1 -- Your Equipment and How to Use It
Teaching Video, Part 2 -- A Lexicon of Shots
Teaching Video, Part 3 -- Shot Composition and Sequencing
Teaching Video, Part 4 -- Nat Sounds and Action Shots
Teaching Video, Part 5 -- Interviews
Teaching Video, Part 6 -- Standups
Teaching Video, Part 7 -- Choosing Your Video Stories and Shooting Them Wisely
Teaching Video, Part 8 -- Ingesting Into Premiere
Teaching Video, Part 9 -- Writing Your Script
Teaching Video, Part 10 -- Editing
Teaching Video, Part 11 -- Raising Your Game


Comments
Post a Comment